Introduction: The Art of Wooden Product Photography
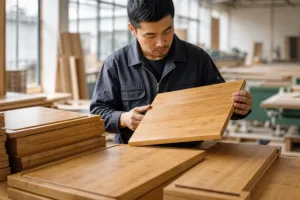
Capturing the beauty of wood takes more than a quick snapshot. To convey the warmth, texture, and unique character of each piece, wooden product photography demands skillful attention to detail. Whether you photograph bamboo trays, oak cutting boards, or walnut gift boxes, understanding lighting, composition, and finish makes all the difference. This guide reveals techniques to highlight wood grain and finish—turning simple product images into powerful selling tools.
Lighting Angles: Making Wood Texture Pop

Light transforms wooden surfaces. The right lighting angle brings out the subtle ridges, pores, and figure patterns that tell each piece’s story. Start by choosing a soft, diffuse light—natural daylight works well, especially from a window at a 45-degree angle. This casts gentle side-shadow that exaggerates texture without blowing out highlights.
Key Approaches to Lighting Wood
- Side Lighting: Place your light source to the side (45-90 degrees from the camera) to highlight raised grain and pores. This method works for showing depth on rough-hewn or open-pore boards.
- Back Lighting: For translucent woods or items with delicate edge details, light from behind reveals hints of the internal structure.
- Overhead Lighting: An overhead soft box or light tent smooths tough shadows and brings out the shimmer in polished veneers—ideal for glossy finishes or intricate inlays.
Controlling Reflections and Shine
Bamboo Wood Art applies food-safe, water-based varnish to many products. These protective coatings can reflect glare under direct light. Use a circular polarizing filter on your camera or lens to cut unwanted reflections and reveal the true surface beneath. Try rotating the filter while shooting to find the best clarity.
Backgrounds & Composition: Supporting the Grain
Choosing the right background for wooden product photography sets the stage. Aim for subtle, neutral surfaces that won’t compete with the product. Grey, white, or pale beige paper sweeps are safe bets—textured backdrops like rough linen or stone can also work, so long as they don’t clash with the grain pattern.
Template Shots for Every Product
- Full-View: Entire product in frame, diagonally arranged to show length and edge detail.
- Texture Close-up: Macro shot focused on wood pores, end grain, or joint detail.
- Profile Edge: Side angle that highlights thickness and finish layer.
- Hero Angle: Dynamic perspective with raking light to enhance depth.
- In-Use: Contextual shot—cutting board with fresh bread or bamboo tray with teacups, for example.
Pro Tip:
For products like slatted bamboo plates or acoustic wall panels, angle your composition so the lighting runs across the slats. This emphasizes the ridges and alternation in color, capturing the essence of the crafted surface.
Wooden Product Photography
Whether you’re working with moso bamboo, solid oak, or walnut, your approach should suit the wood’s properties. Bamboo has a tight, linear grain and subtle nodes. Oak offers broad, open pores and rays. Walnut, deep chocolate tones and bold figure. Consider the desired mood—warmer tones highlight comfort, sharper light and neutral staging feel modern and precise.
Examples by Application
- Bamboo Cutting Boards: Capture the smooth finish and gentle chamfered edges, using side lighting to show the lamination lines.
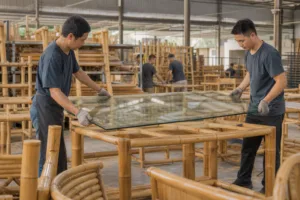
- Furniture Components: Focus on joinery—mortise-and-tenon corners or dowel joints—in strong, raking light to highlight expert craftsmanship.
- Decor Panels: Macro views of the cross-laminated ply and any carved or engraved details, with soft background blur.
Comparing Wood Finishes and Photography Strategies
| Finish Type | Surface Look | Best Lighting Approach | Ideal Background |
|---|---|---|---|
| Natural Oil (Tung/Linseed) | Soft sheen, visible pores | Side-light, macro | Matte white/linen |
| Water-Based Varnish | Glossy, sharp grain | Diffuse + polarizer | Grey/soft shadow |
| Raw Sanded | Matte, open grain | Overhead + slight backlight | Beige/canvas |
| Carbonized Bamboo | Rich, warm brown | Directional, low raking angle | Stone/neutral |
Lens Choices & Camera Settings
Prime lenses—50mm or 85mm—offer sharpness and natural perspective. Choose a small aperture (f/8–f/16) to keep the entire product sharp, especially for catalog or B2B images. Boost ISO only if light is low; noise reduces clarity in the grain. Keep white balance accurate—use a grey card for color-critical work so the warmth of beech, ash, or bamboo is never lost in post-processing.
Capturing Pores, Edges, and Finish Details
The finest bamboo platter or wooden décor piece can lose its appeal in a flat, overexposed photo. Focus on showing fine details—tiny pores, end grain patterns, chamfered or rounded edges, and smooth, lacquered surfaces. Macro lenses or a close-focusing zoom bring you within a few inches of the subject, revealing craftsmanship. Watch for specular highlights—these glare spots can hide real color and detail. Adjust your light position or flag it with a card or polarizer until natural texture shines through.
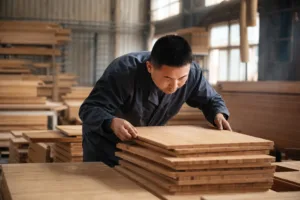
Edge Profile Shots
Especially for industrial clients, showing the thickness, edge radiusing, and lamination lines builds trust. Capture angled shots to demonstrate warpage resistance or composite ply structure, like the multi-layered boards often manufactured by Bamboo Wood Art.
Retouching in Wooden Product Photography: Dos and Don’ts
Retouching should clarify, not deceive. Clean up dust, hair, or smudges, but avoid erasing natural character. The best wooden product images celebrate small knots, figure, and mineral streaks—evidence of real material, not plastic imitation. Always preserve the unique grain patterns, and resist the urge to blur or oversmooth. Maintain color fidelity—rich amber bamboo or deep brown walnut should look real, not artificially boosted.
- Do: Remove surface flaws, balance exposure, and boost contrast for clarity.
- Don’t: Clone out all grain variation, overly brighten, or color-shift wood away from its true tone.
Exporting for Web & Print
Deliver images in both web and print resolutions. For online catalogs, 1500–2500px width at 72dpi gives detail without slow loading. For print, 300dpi TIFFs hold true color. Include close-ups as secondary images to show finish and craftsmanship—a key selling point for B2B clients, like those working with Bamboo Wood Art’s OEM/ODM projects.

Creating a Template Shot List
Consistency helps build trust and makes catalogs easier to scan. Use a shot list for every wooden product photography session:
- Main overview shot (hero, at best angle for grain)
- Texture close-up (macro of pores or surface pattern)
- Profile/edge (side angle to show thickness or joinery)
- Detail of branding/engraving (if present)
- In-use/contextual image
Tips for Batch Shooting
- Set up a standard white or grey sweep for backgrounds.
- Use stable tripod and controlled light.
- Clean each product before every shot.
- Shoot color/grey card for easy white balance in post.
- Log shot types and angles for each product.
Color Accuracy and Post-Processing
Maintaining true color is critical, especially for B2B buyers comparing bamboo, oak, or walnut. Calibrate your monitor, and check final images on several screens. Avoid heavy vignettes or filters, which can distort subtle hues. Batch-save adjustments using Lightroom or Capture One—keep settings consistent to present your range cohesively.
Common Wooden Product Photography Mistakes
- Harsh direct flash: Flattens grain and produces specular hotspots.
- Messy backgrounds: Distracts and can create color casts on pale woods.
- Over-editing: Leads to unnatural results; wood should remain tactile and inviting.
- Poor focus: Misses edge or branding details essential for business clients.
Wooden Product Care Before Photography
Prepping wood before photography shows attention to detail. Wipe all surfaces with a lint-free cloth; if safe, lightly buff with a clean, dry cotton pad. For cutting boards or utensils, a thin layer of food-grade mineral oil or beeswax restores luster without altering color. Avoid silicone sprays, which leave residue. Inspect for dust, stray fibers, or tiny manufacturing marks—these stand out in macro or high-resolution.
Conclusion: Crafting Visual Trust
Powerful wooden product photography reveals the heart of your material and the skill of your maker. Well-lit images with natural color and visible grain connect customers to authenticity. Whether showcasing a single luxury tray or a full B2B catalog, invest in the techniques above to help your products stand out—and highlight the expert finish of crafted wood from proven manufacturers like Bamboo Wood Art.
Frequently Asked Questions
What lighting is best for showing wood grain in product photos?
Soft, side-angle lighting reveals wood grain and texture best. Avoid harsh direct flash, which causes glare.
Should I use a polarizer when photographing wood products?
Yes, a circular polarizer reduces surface reflections and shows the true grain, especially on varnished or glossy finishes.
What background colors help highlight wood texture?
Neutral backgrounds like white, grey, or pale beige make wood textures and colors stand out without distraction.
How can I capture fine details like pores and edge profiles?
Use a macro lens and strong side or raking light to emphasize pores and edge details for a tactile look.
What post-processing should be done on wooden product photos?
Remove dust, balance color, and boost contrast, but retain natural grain and avoid over-editing or fake tones.
How do I keep wood colors accurate in photos?
Use a grey card for white balance, shoot in RAW format, and check colors across calibrated screens for accuracy.